Kitchen Exhibitionist
The Culinary Quests of a Food Enthusiast Stuck in the Sticks
Recent Posts
Wednesday, January 31, 2007
Secret Ingredient Peas
Secret Ingredient Peas
It is quite surprising to me that I am about to share a recipe for peas. As a child I hated most vegetables but now as an adult I love all vegetables with one exception… peas.
Perhaps the childhood incident where I was bitten by a Shetland pony as I fed him leftover peas has kept me from eating this popular green vegetable all these years. Or maybe I can blame peas’ banishment from my plate on my little sister, who one evening at the family dinner table pushed a pea up her nose where it lodged into her sinus cavity and had to be retrieved by a doctor in the emergency room.
In any case, even though I’ve never cared for peas myself, most people do enjoy them so over the years I have prepared this vegetable to appease (sorry!) the palates of others. Through experimentation and by following my kitchen instincts I have created a simple recipe for peas that I actually love. Others, whose feelings toward peas also run lukewarm, actually rave about this dish and go back for seconds.
 There are two tricks to this recipe. One is in the preparation method and the other is a secret seasoning ingredient. The secret ingredient is just a pinch of a much underrated and little-used spice, fenugreek.
Several years and many jobs ago I was introduced to fenugreek by a coworker. She added it to many dishes with great results, so I ordered a small jar of ground fenugreek from Penzey’s to use in my kitchen.
When I first opened the jar and inhaled its fragrance, I encountered the scents of maple, celery, and a very subtle curry aroma. After years of using fenugreek I have determined that one of its best uses is to turn frozen peas into an incredible side dish. In addition to the fenugreek, the preparation method is also a key part of dish. Simple as it is, I do believe it gives this dish its special flavor and texture.
Lydia’s Secret Ingredient Peas
2 tsp Better Than Bouillon Chicken paste mixed with 2 cups hot water
(or 2 cups quality chicken broth, heated)
2 tablespoons butter
½ tsp ground fenugreek
½ tsp salt
1 lb frozen peas
This dish may be made either in the microwave or via stovetop. Place the hot chicken broth and butter in a saucepan or microwave-safe casserole dish and stir until the butter has melted.
Add the fenugreek and salt and stir until dissolved. Stir in the frozen peas and let them sit at room temperature while you prepare the rest of the meal or do something else. An hour is best, but longer is fine. During that time they will slowly defrost and absorb the flavors of broth and seasonings.
When ready to serve, heat the peas on the stove or in the microwave just until hot. Drain off most of the liquid and serve with a slotted spoon.
Tags: peas, recipe, fenugreek
Wednesday, January 24, 2007
German Butter Chicken and Spaetzle
I used to be drawn to cookbooks that promised great recipes using only a handful of ingredients. Concepts like “Express Lane Cooking”, “5 in 10” (five ingredients in 10 minutes), or “3 ingredient cooking” were the themes that these books promoted that prompted me to purchase them, hoping they would save time in the kitchen. Plus I’m a sucker for gimmicky cookbooks
Most of the time, I was disappointed in both the quality of the recipes and in the authors’ interpretation of their main theme. The recipes in all of these books do not count water, salt or pepper as ingredients, which I guess is fair, but some authors went as far as discounting spices, oil, flour and other staples from the ingredient tally, which to me, seemed like cheating. Others relied heavily on convenience foods as ingredients, such as onion soup mix or canned cream of mushroom soup, resulting in dishes that are salty, overly processed, and just not tasty. And some of the recipes were not even recipes. Now really, do I need a cookbook to tell me that I can make ice cream sandwiches by placing store-bought ice cream between store-bought cookies? Although I may have discovered one or two recipes worth making again, in general, I found these cookbooks to be flops.
As I was typing up the recipe for this old family chicken dish, I realized it qualifies for the “few ingredients” title. The chicken component uses only two ingredients (not counting water, salt, and pepper) and the spaetzle require only three, for a total of five ingredients. But this delicious comfort-food dish is far from a kitchen gimmick. It uses real natural ingredients to create a long-time family favorite.
German Butter Chicken and Spaetzle is a very simple but flavorful stewed chicken with small noodle-like dumplings in a scrumptious broth. If I had to describe the flavor of this dish with a color, I would call it golden.
This is the kind of dish to have simmering on the stove on a cold winter day while you putter around the house. It is quite economical to make and it really satisfies. The ingredients are so few and so simple that I have often been tempted to embellish it but have always resisted for fear of ruining its charming simplicity.
When you read this recipe your first impulse may be to pass it by because it doesn’t sound like anything special. But please don’t dismiss it. While it sounds plain and bland on paper, in the pot it is very special. The main part of the recipe is made from only chicken, butter, water, salt and pepper, but the method of preparation results in a marvelous combination of moist, tender, falling-off-the-bone meat in a rich, buttery chicken broth. The spaetzle bathe in this golden broth, absorbing the flavors, and becoming the best part of the dish.

The key to turning a few simple ingredients into this complex mélange of rich flavors is in how the butter is used. Of course, only real pure butter will do. The chicken is first sautéed in the butter until golden. The butter browns, which adds a light nutty flavor to the broth. Using a pot with a regular finish (not a non-stick finish) is critical to the final flavor of this dish. As the chicken browns it leaves the fond (caramelized brown particles) on the surface of the pot, which eventually adds its flavors to the finished broth. This just doesn't seem to happen with a non-stick finish pot.
If you don't have a spaetzle maker, don't worry; there are many other ways to make spaetzle. I only recently picked up a spaetzle maker on clearance for a few bucks, but have made this dish many times in the past using regular kitchen utensils (the details are in the recipe).
Like most dishes of this style, it is even better after it sits for a few hours or overnight.
The spaetzle by themselves are also good served in soups, or with pot roasts, stews, and other saucy dishes. A handful of homemade spaetzle will turn canned cream of tomato soup into something very special.
German Butter Chicken and Spaetzle
1 chicken cut-up or equivalent bone-in chicken parts
1/4 pound butter
salt and pepper
Spaetzle:
2 cups all purpose flour
1 teaspoon salt
2 eggs
1 cup milk
I use only the legs, thighs and breasts when I make this dish, cutting the whole breast into 4 or 5 pieces. If I start with a whole chicken, I reserve the wings and backs for future stock.
Remove the skin from the chicken parts by grabbing it with a paper towel and pulling it off. Trim off the really big blobs of fat but don’t be meticulous about it; leave some fat for flavor.
We will be sautéing the chicken in two batches. Don’t try to save time by sautéing all the chicken pieces at once. They won’t brown properly and the few minutes you save will ruin the dish by drastically reducing its flavor.
Over medium heat melt half the butter in a large, heavy deep pot, like a dutch oven. Don't use a non-stick pot because it is important that as the chicken browns it leaves the "fond" (caramelized brown particles) on the surface of the pot. This is key to the final flavor of the dish and it just doesn't seem to happen with a non-stick finish pot.
Place half the chicken pieces in the pot and cook until nicely browned, about 5 minutes. Turn pieces over, season very liberally with salt and pepper and allow the other side to brown. Be sure to allow the chicken to get nice and golden. Remove the browned chicken parts and repeat with the remaining butter and chicken parts.
Return all the chicken to the pot and add water until the chicken is just barely covered. Bring to a simmer, lower the heat, partially cover the pot and cook gently for 45 minutes.
In the meantime, prepare the spaetzle. Mix the flour and salt in a medium bowl. In another bowl or glass measuring cup beat the eggs and mix with the milk. Add the egg mixture to the flour and stir until smooth. Allow to rest for 30 minutes, stirring occasionally.
Bring a large pot of salted water to a simmer over medium heat to cook the spaetzle.
My spaetlze maker looks like a flat metal grater with a sliding compartment on it, but instead of shredding holes it has round holes the size of tiny peas. Before I had this device I used a large flat round slotted spoon with round holes and a wooden spoon to push the dough through the holes. Before that I used a metal colander with roundholes and a spoon to push the dough. You can also use a potato ricer with the plate with the larger holes. My mother just tilts the bowl of batter over the pot of boiling water and uses a knife to cut the dough as it falls into the boiling water, which results in much larger spaetzle. Basically, you want little bits of the dough to drop into the simmering water. All these methods work fine but the spaetzle maker is easier and creates more uniform spaetzle.
In two or three batches, press the batter through your device of choice into the gently simmering water. Cook and stir until the spaetzle float to the surface, and then cook for another minute, until firm but tender. Remove with a slotted spoon and add the spaetzle to the pot of chicken.
Allow the spaetzle to simmer in the chicken mixture for 20 minutes before serving; or even better, turn off the heat and allow it to sit for an hour or two. Or chill and refrigerate overnight or longer. When refrigerated, the mixture will have solidified into a solid mass from the richness of the chicken broth and butter. Reheat it very gently until it liquefies, stirring carefully so as not to break up the chicken meat.
Yield: 4 – 6 servings
Tags: chicken, spaetzle, recipe, German, 5 ingredients
Wednesday, January 17, 2007
Clandestine Foods
Clandestine Foods
Everyone has at least one strange, secret food preparation, consumed surreptitiously when alone and never, ever shared with others. I recall how M.F.K. Fisher secretly enjoyed the tangerine segments that she would warm on the radiator until plump and then chill in the snow on the windowsill, creating a crisp shell enclosing cool sweet pulp. I know someone who confesses to eating goldfish crackers and milk together in a bowl with a spoon, like cereal.
I believe most of these odd, private recipes are accidental discoveries. My own favorite clandestine food came about as an offshoot of my grandmother’s frugality.
Nana made wonderful breaded fried foods. Veal cutlets, fish fillets, or pork chops were dusted with flour, dipped in beaten eggs and coated in Italian-seasoned dry breadcrumbs. They were then fried in hot olive oil on each side until crisp and golden and served immediately with fresh lemon wedges to squeeze over them. These dishes were so simple, yet so delicious.
As a child I used to help Nana in the kitchen with the breading process. After breading all the meat, there were always some leftover beaten eggs and breadcrumbs. So as not to waste good food, Nana would mix the two together to make a thick batter, drop spoonfuls into the hot olive oil, and fry them on both sides. These bread crumb patties had a golden crisp crust surrounding a surprisingly bread-like interior. They were warm and flavorful, and fragrant from the seasonings and the olive oil. These were my treats, made just for me for helping, and I devoured them.
Now many years later, on late nights alone when I crave something simple and comforting, I’ll make these bread crumb patties for myself. With the fist bite, I think, “Wow, these are good. I should serve them to others.” But then I realize that perhaps my enthusiasm for them is more a nostalgic memory of helping Nana in the kitchen than an actual reflection of the tastiness of the patties. So I never shared this secret dish before, until now.
Tags: clandestine, recipe, food
Wednesday, January 10, 2007
Gilding Breakfast’s Porcine Lily
Rosemary and Mustard Breakfast Sausages
I seem to be on a rosemary binge lately. This is the third recipe I’ve posted in as many weeks that features this fresh, aromatic herb. It must be rosemary’s clean, pure, almost pine-like scent that has me using it in every course from breakfast to dinner.
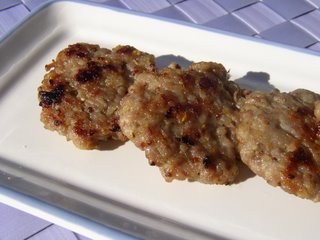
These easy to make glorified sausage patties will dramatically enhance even the most basic breakfast or simple brunch. The recipe starts with store bought sausage meat and embellishes it with fragrant fresh rosemary, spicy coarsely ground Dijon mustard with its gentle crunch of soft seeds, and sweet caramelized onions. The end result is like no sausage you’ve had before.
Rosemary and Mustard Breakfast Sausages
Adapted from Bon Appétit - December 2004
1 tablespoon olive oil
1 medium onion, finely chopped
1 teaspoon chopped fresh rosemary
1 14-ounce package breakfast sausages, casings removed
2 teaspoons whole grain mustard
Fresh rosemary sprigs for garnish
Heat oil in small skillet over medium-high heat. Add onion and chopped rosemary; sauté until golden, about 10 minutes. Transfer to medium bowl. Add sausage, mustard, and generous amount of freshly ground black pepper. Mix gently. Form into twelve 2-inch-diameter patties. (Can be made 1 day ahead; chill.)
Place sausage patties in a large skillet and cook over medium heat, turning once, until cooked and lightly browned. Transfer sausages to paper towels to drain, then arrange on platter. Garnish with rosemary sprigs and serve.
Makes 12 small patties.
Tags: rosemary mustard sausage, recipe, sausage
Rosemary and Mustard Breakfast Sausages
I seem to be on a rosemary binge lately. This is the third recipe I’ve posted in as many weeks that features this fresh, aromatic herb. It must be rosemary’s clean, pure, almost pine-like scent that has me using it in every course from breakfast to dinner.
These easy to make glorified sausage patties will dramatically enhance even the most basic breakfast or simple brunch. The recipe starts with store bought sausage meat and embellishes it with fragrant fresh rosemary, spicy coarsely ground Dijon mustard with its gentle crunch of soft seeds, and sweet caramelized onions. The end result is like no sausage you’ve had before.

Rosemary and Mustard Breakfast Sausages
Adapted from Bon Appétit - December 2004
1 tablespoon olive oil
1 medium onion, finely chopped
1 teaspoon chopped fresh rosemary
1 14-ounce package breakfast sausages, casings removed
2 teaspoons whole grain mustard
Fresh rosemary sprigs for garnish
Heat oil in small skillet over medium-high heat. Add onion and chopped rosemary; sauté until golden, about 10 minutes. Transfer to medium bowl. Add sausage, mustard, and generous amount of freshly ground black pepper. Mix gently. Form into twelve 2-inch-diameter patties. (Can be made 1 day ahead; chill.)
Place sausage patties in a large skillet and cook over medium heat, turning once, until cooked and lightly browned. Transfer sausages to paper towels to drain, then arrange on platter. Garnish with rosemary sprigs and serve.
Makes 12 small patties.
Tags: rosemary mustard sausage, recipe, sausage
Wednesday, January 03, 2007
Sale Profumato - Perfumed Salt
My gastronomical vacation to the Emilia-Romagna region of Italy in November taught me many surprising lessons. One lesson that seemed to appear over and over was that often the simplest things are the most amazing. Like the unpretentious but incredible pizza with roasted eggplant cooked in a wood fired oven at Nicola’s Ristorante in Bologna. Or how flavorful fresh parsley can be when it is used as more than a garnish. Or the wonderful brodo (broth) whose secret ingredients were chicken feet and a piece of rind of parmigiano reggiano. And then there is sale profumato, perfumed salt.
A cooking class with Chef Nicola of Ristorante Villa Golini in Riolo Terme first introduced me to this amazing condiment. Nicola held a container of salt-based seasoning under my nose. I sniffed and discovered the very delightful scents of garlic and herbs with an almost floral undertone, which turned out to be rosemary. We seasoned several dishes with this seasoning, including Robespierre steak and oven roasted potatoes.
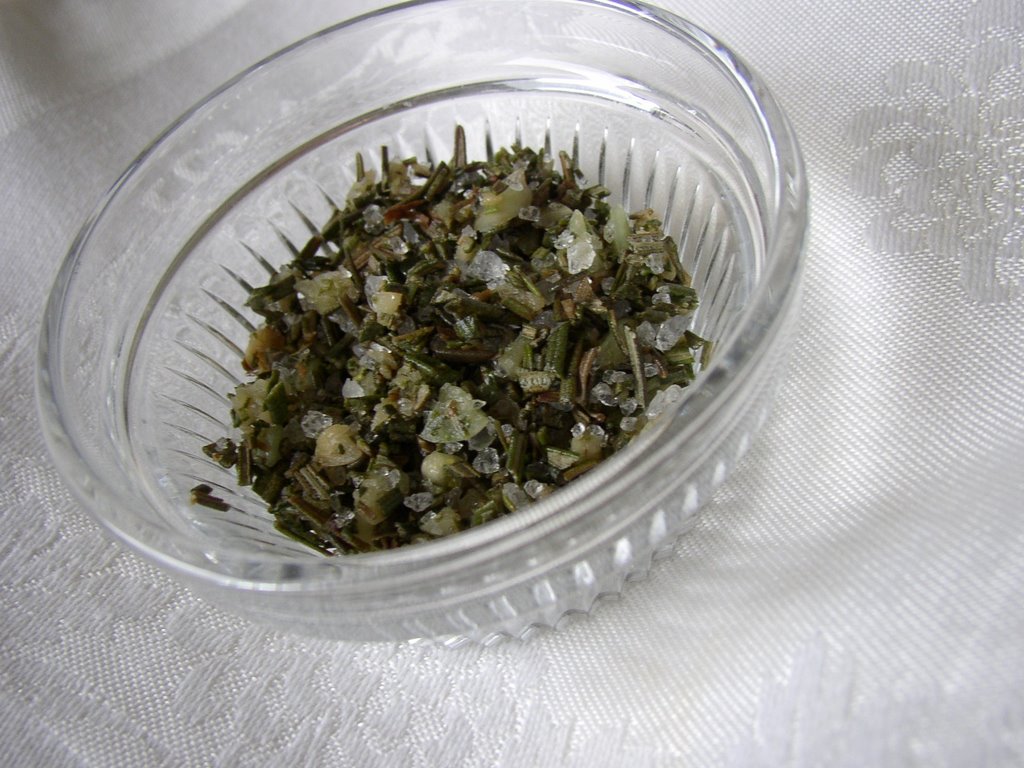
A few days later, during cooking lessons in the Tori household in Bologna, Raffaella showed us how to make this simple but magical seasoning. Nothing more than coarse salt, fresh rosemary and fresh garlic chopped together creates an incredible aromatic mixture that adds the perfect highlight to roasted or grilled meats, or roasted vegetables. I plan to use it to flavor focaccia dough before baking and to season olive oil for bread dipping.

The mixture I made in Raffaella’s kitchen is now safely ensconced in a glass jar in my refrigerator (thankfully U.S. customs didn’t question it), where it will last for months, or at least until I use it up. I often find myself opening the jar and inhaling deeply just to relive those fragrant memories.
I saw bottles of sale profumato in some grocery stores in Italy, but knew it would be nothing like the fresh homemade version. This stuff is so easy to make and wonderful to use, everyone should keep a supply on hand. Here’s how.
Sale Profumato
Fresh rosemary leaves, removed from the stems, about a small handful
5 large cloves garlic
½ cup coarse salt
On a cutting board, use a large chef’s knife to chop all the ingredients together until well blended. As you chop you will be rewarded with wonderful aromas.
Place the mixture in a glass jar with a tight lid and store in the refrigerator, where it will last for months.
Tags: sale profumato, recipe, rosemary
My gastronomical vacation to the Emilia-Romagna region of Italy in November taught me many surprising lessons. One lesson that seemed to appear over and over was that often the simplest things are the most amazing. Like the unpretentious but incredible pizza with roasted eggplant cooked in a wood fired oven at Nicola’s Ristorante in Bologna. Or how flavorful fresh parsley can be when it is used as more than a garnish. Or the wonderful brodo (broth) whose secret ingredients were chicken feet and a piece of rind of parmigiano reggiano. And then there is sale profumato, perfumed salt.
A cooking class with Chef Nicola of Ristorante Villa Golini in Riolo Terme first introduced me to this amazing condiment. Nicola held a container of salt-based seasoning under my nose. I sniffed and discovered the very delightful scents of garlic and herbs with an almost floral undertone, which turned out to be rosemary. We seasoned several dishes with this seasoning, including Robespierre steak and oven roasted potatoes.
A few days later, during cooking lessons in the Tori household in Bologna, Raffaella showed us how to make this simple but magical seasoning. Nothing more than coarse salt, fresh rosemary and fresh garlic chopped together creates an incredible aromatic mixture that adds the perfect highlight to roasted or grilled meats, or roasted vegetables. I plan to use it to flavor focaccia dough before baking and to season olive oil for bread dipping.
The mixture I made in Raffaella’s kitchen is now safely ensconced in a glass jar in my refrigerator (thankfully U.S. customs didn’t question it), where it will last for months, or at least until I use it up. I often find myself opening the jar and inhaling deeply just to relive those fragrant memories.
I saw bottles of sale profumato in some grocery stores in Italy, but knew it would be nothing like the fresh homemade version. This stuff is so easy to make and wonderful to use, everyone should keep a supply on hand. Here’s how.
Sale Profumato
Fresh rosemary leaves, removed from the stems, about a small handful
5 large cloves garlic
½ cup coarse salt
On a cutting board, use a large chef’s knife to chop all the ingredients together until well blended. As you chop you will be rewarded with wonderful aromas.
Place the mixture in a glass jar with a tight lid and store in the refrigerator, where it will last for months.
Tags: sale profumato, recipe, rosemary